


Overview
Port Forwarding mode publishes selected VPS services through the SixtyNet relay endpoint. You choose the destination port and protocol; the system automatically assigns an available public port.
Open Residential-Pro Access
- Sign in to the SixtyNet Client Area.
- Open Services and select your Residential-Pro VPS.
- Choose Manage Access & Ports.
- Select the Port Forwarding tab.
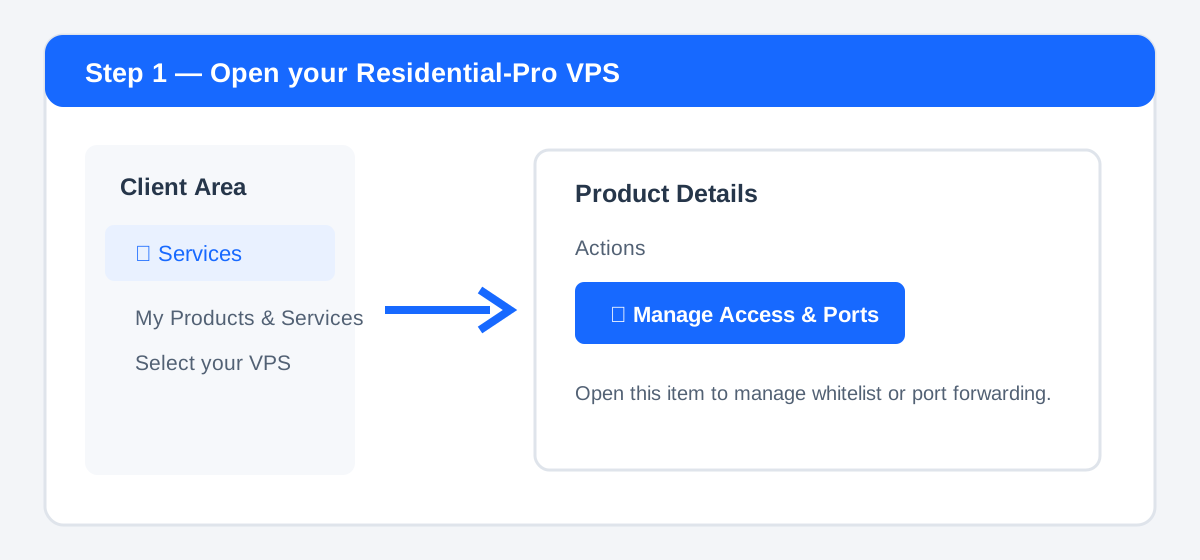 Open your VPS product page and select Manage Access & Ports under Actions.
Create a port mapping
- Enter the Destination port used by the service inside your VPS.
- Select TCP, UDP, or TCP + UDP.
- Optionally enter a short remark such as
SSH,RDP, orGame server. - Click Add mapping.
- After creation, copy the automatically assigned public port from the mapping table.
Customers cannot select the public port. It is assigned automatically from the available pool to prevent conflicts. Each VPS may have up to 5 port mappings.
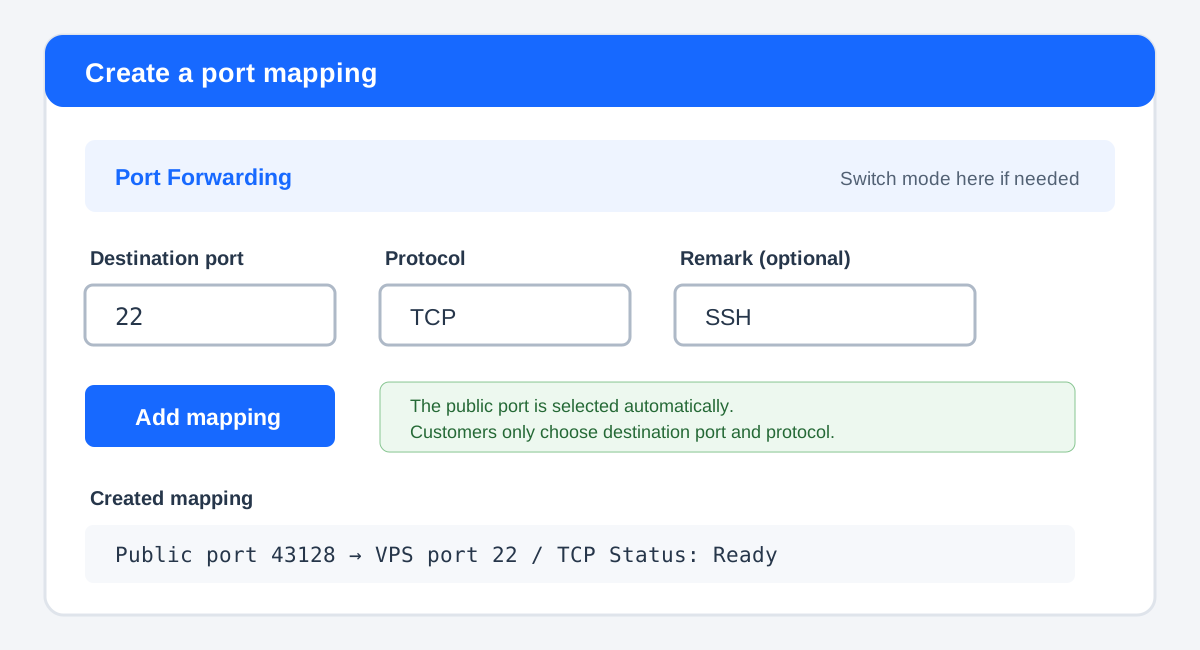 Choose the VPS destination port and protocol. The public port is assigned automatically after you click Add mapping.
Connect to the mapped service
Use the relay hostname and assigned public port:
relay-us.sixtynet.net:ASSIGNED_PUBLIC_PORT
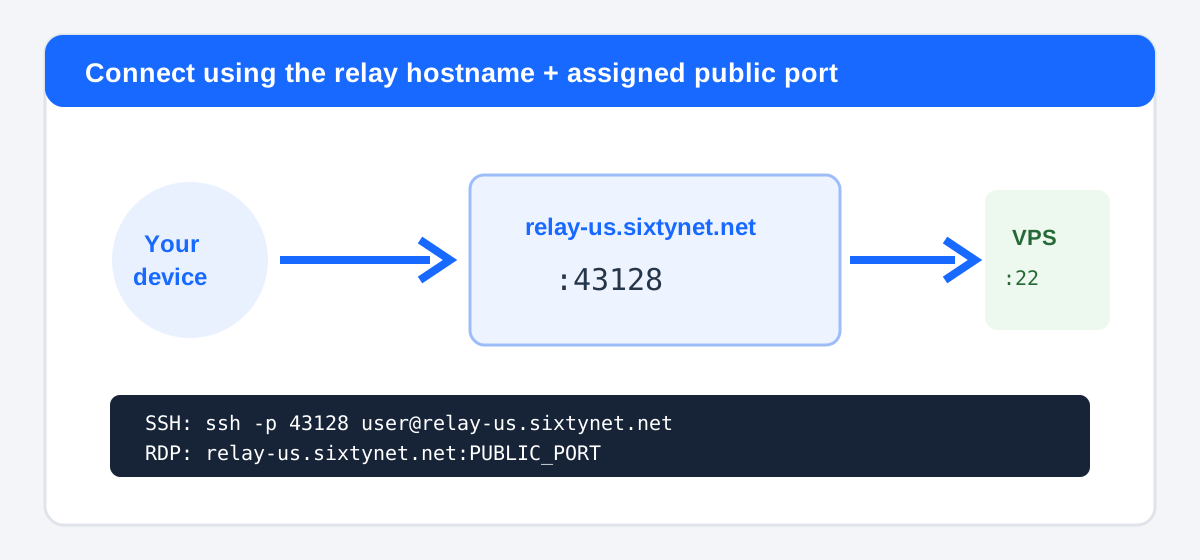 Connect to relay-us.sixtynet.net using the public port shown in the mapping table.
Examples
| Service | Destination port | Recommended protocol | Connection example |
|---|---|---|---|
| SSH | 22 | TCP | ssh -p PUBLIC_PORT user@relay-us.sixtynet.net |
| Remote Desktop | 3389 | TCP + UDP | relay-us.sixtynet.net:PUBLIC_PORT |
| Web application | Your application port | TCP | http://relay-us.sixtynet.net:PUBLIC_PORT |
Replace PUBLIC_PORT with the number shown in your mapping table. Always use the relay hostname rather than a fixed relay IP address.
Delete a mapping
Click Delete next to the mapping and confirm the action. The public port stops forwarding after the deletion succeeds.
Switch from IP Whitelist
Select the Port Forwarding tab and open the dedicated switch confirmation page. Confirming the switch removes the current whitelist and enables Port Forwarding mode. After the switch succeeds, only port-forwarding controls are displayed.
Troubleshooting
- Confirm that the portal shows Mode: Port forwarding and the mapping status is Ready.
- Use the assigned public port, not the destination port, when connecting to the relay hostname.
- Confirm that the service is listening on the destination port inside the VPS.
- Check the VPS operating-system firewall and application bind address.
- TCP and UDP are separate protocols. Select TCP + UDP when the application requires both.
- Connectivity may vary by ISP or region; reachability from every network is not guaranteed.
Security recommendations
- Publish only the ports you need and delete unused mappings.
- Use strong authentication, SSH keys, and current software.
- Do not expose administrative dashboards without their own authentication and access controls.